A portable chainsaw mill turns fallen logs into usable boards and slabs without hauling timber to a sawmill. The appeal is simple: mill where the tree drops, control thickness for the project at hand, and keep costs predictable. Below is a practical guide to what “adjustable thickness” really means, how to match a mill to 14″–36″ bars, what to expect for cut quality, and a setup checklist that helps deliver straight, repeatable results.
A portable chainsaw mill clamps to a chainsaw bar and rides on rails (or a straight reference surface) to rip logs into slabs and boards. It’s a strong option for occasional milling, storm-fall salvage, remote properties, and one-off dimensional cuts for projects like benches, beams, mantels, and rustic siding.
It’s not a replacement for a full bandsaw mill when high throughput, ultra-smooth finish, or production-level accuracy is the priority. Chainsaw milling shines when you need mobility and flexibility—especially if moving logs is the hard part.
For best performance, plan on using a sharp ripping chain, a stable guide for the first cut, and patient feed pressure. Rushing the cut is one of the fastest ways to create wandering kerfs, taper, or a washboard surface.
Bar length sets the maximum practical cut width, but it’s important to separate “bar length” from “usable slab width.” The mill frame and the powerhead need clearance, so the maximum slab width is typically several inches less than the nominal bar length. Before committing to a target slab size, measure the usable cutting width with the mill mounted.
As bars get longer, the workload rises. Longer bars benefit from higher-power saws; underpowered setups cut slower and are more likely to drift in dense hardwoods. For 24″–36″ bars, rigidity becomes a major factor: flex in the bar or the mill frame often shows up as taper across the slab or a rippled face.
Compatibility is also about the clamping system. Confirm the mill seats securely on the bar without interfering with chain travel or the bar’s nose radius. If the mounting point shifts mid-cut, accuracy goes with it.
| Target thickness | Typical use | Setup notes |
|---|---|---|
| 0.25″–0.5″ | Panel stock, small craft boards | Requires a very straight reference rail; light feed pressure reduces chatter |
| 1″ | General lumber, shelving, framing for small structures | Aim for consistent rail height; recheck fasteners after the first cut |
| 2″ | Benches, thicker structural pieces, rustic furniture parts | Use a sharp ripping chain; slow down in knots to prevent drift |
| 3″–6″ | Live-edge slabs, mantels, beams | Expect slower cutting; manage heat and chips with periodic pauses |
| 6″–11.8″ | Extra-thick slabs and specialty timbers | Requires stable log support and adequate saw power; prioritize rigidity and safety |
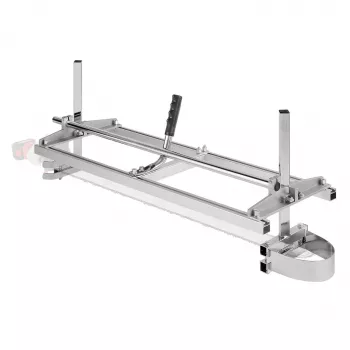
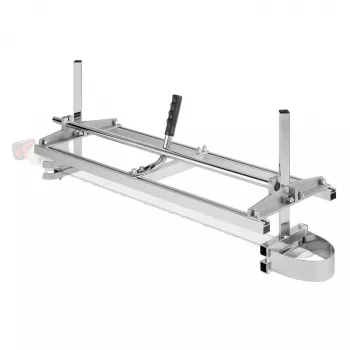
If the goal is flexible on-site milling across multiple saw setups, a mill designed for a wide bar range simplifies the process. The Portable Chainsaw Mill for 14″-36″ Bars, Adjustable Thickness 0.2″-11.81″ is built to cover compact bars for smaller logs and longer bars for wider slabs, while offering a thickness range that supports thin boards through extra-thick live-edge work.
For jobs that keep you outdoors for hours—especially on remote properties—simple comfort items can matter. A compact add-on like the Reversible Pre-Seasoned Cast Iron Griddle with Non-Stick Surface for BBQ and Cooking can be a practical camp or shop accessory for quick meals when the “worksite” is far from the kitchen.
Avoid cutting above shoulder height, maintain stable footing, and keep both hands on the saw handles. Let the saw do the work—forcing the cut increases kickback risk and can reduce accuracy. For a clear baseline on safe practices, review OSHA’s guidance on chainsaw safety: https://www.osha.gov/publications/bytopic/chainsaw.
Keep stacks covered from rain and direct sun while allowing airflow through the pile. Wood moves as it dries, so mill slightly oversize when tight tolerances matter after drying and surfacing. For deeper detail on moisture, drying, and dimensional stability, the USDA Forest Products Laboratory Wood Handbook is a trusted reference: https://www.fpl.fs.usda.gov/products/publications/wood_handbook.php.
Usually not—the maximum slab width is typically several inches less than bar length because the mill frame and powerhead need clearance. A practical approach is to mount the mill, measure the usable cutting width, and size your target slabs to that measurement rather than the bar’s nominal length.
Ripping chain is typically the best choice for milling because it cuts more efficiently along the grain and can leave a cleaner surface. Whatever chain you use, sharp cutters and consistent raker height matter as much as the chain style for smooth, straight results.
Start with a level, rigid first-cut guide and confirm the mill rails are parallel before cutting. Tighten clamps after a short test pass, keep a steady feed rate, and use wedges to prevent pinching; recheck measurements if you notice drift or taper developing mid-cut.











Leave a comment